Capturing High-Altitude Power Lines with the Agras T50
Capturing High-Altitude Power Lines with the Agras T50: A Field Method That Prevents Lost Detail
META: A practical expert tutorial on using the Agras T50 for high-altitude power-line imaging, with exposure control, field planning, sensor awareness, and battery management tips grounded in real operational data.
Power-line capture with an Agras T50 is not the usual conversation around this aircraft. Most people approach the platform through spraying, spreading, swath width, nozzle calibration, or drift control. Those are valid topics. But there is another operational reality in the field: crews often use the aircraft as part of a broader visual documentation workflow around tall infrastructure, remote corridors, and hard-to-access assets near agricultural or utility-adjacent land.
That changes the shooting discipline.
If you are trying to document power lines at altitude, the failure point is rarely that the line was impossible to reach. The failure point is that the image looked acceptable on site, then proved weak when reviewed later. Detail is gone in the bright sky, conductor edges blur into glare, and insulator structure loses definition. At that point, the flight time is already spent.
The central lesson is simple: never trust the live screen alone when setting exposure in bright outdoor conditions.
That principle comes directly from a photography reference that deserves more attention in drone operations. The source warns that many shooters adjust exposure until the display “looks right,” even though screen brightness is heavily influenced by ambient light. Under strong sun, the monitor often appears darker than the file actually is, which pushes operators to raise exposure too far. Once highlights clip to pure white, the missing detail is effectively unrecoverable. That matters enormously for power-line work, because sky background and reflective hardware can blow out before the operator notices.
Why this matters specifically on the Agras T50
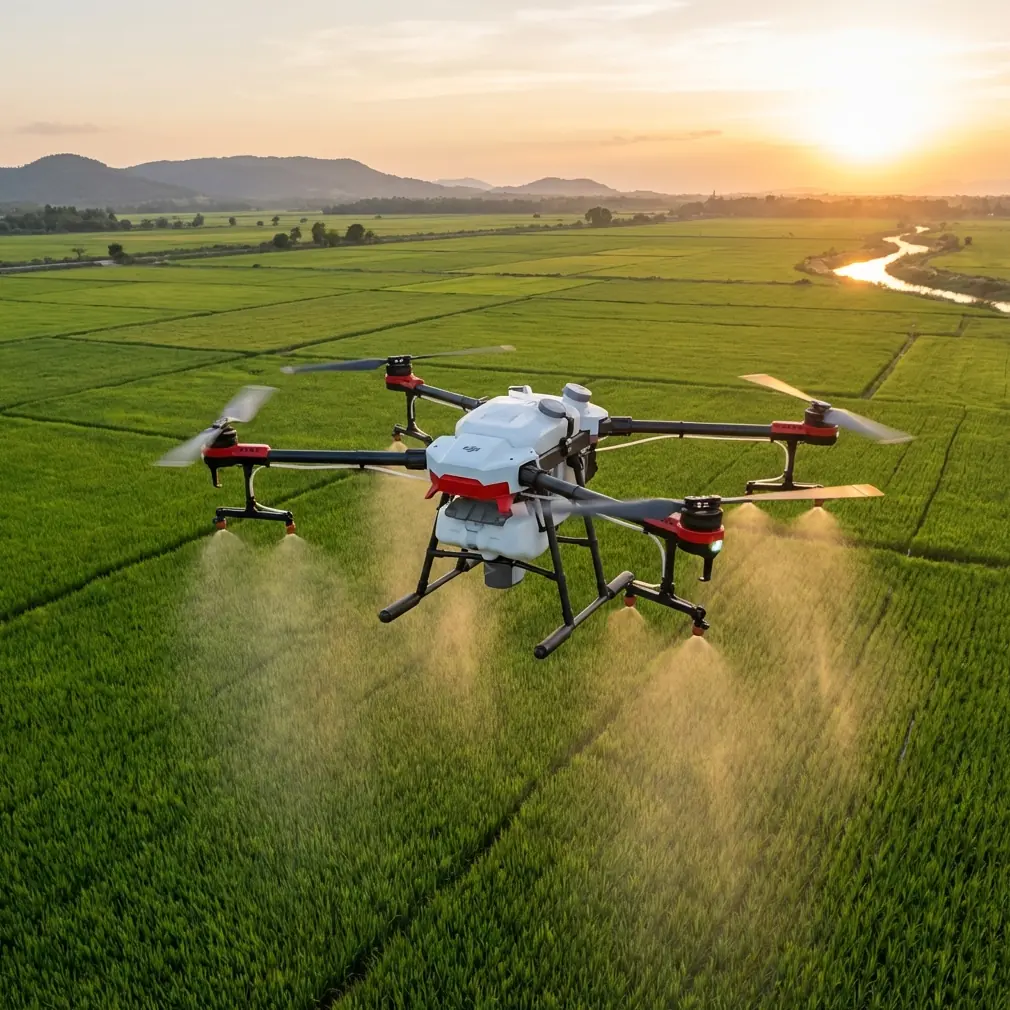
The Agras T50 was not built as a dedicated cinematic platform. It is a heavy-duty work aircraft designed for serious field productivity, adverse conditions, and repeatable operations. In that sense, it is actually well suited to disciplined utility-adjacent imaging if you approach it like an industrial tool rather than a camera toy.
That means three things.
First, your image settings should follow measurement logic, not aesthetic instinct.
Second, your route planning should resemble a survey task, not a casual orbit.
Third, your battery decisions must be conservative, especially in high-altitude line work where repeated climbs and hover corrections consume more energy than operators expect.
I have seen crews treat power-line capture as “just get close and shoot.” That is the wrong model. A better model comes from corridor mapping and mobile LiDAR workflows, where the team first defines the range, width, obstacles, and signal-risk areas before collecting anything. One reference project in Shunde ran along an east-west corridor approximately 8.14 km long and explicitly checked road conditions, vegetation coverage, and interference factors before field collection. The reason was practical: vegetation can create signal lock issues, while trucks and parked vehicles can obstruct access and degrade data collection.
For an Agras T50 power-line capture mission, the same logic applies. Before takeoff, define:
- total line segment length
- clear working width
- likely visual obstructions
- background brightness conditions
- GNSS reliability zones
- emergency landing options
- battery reserve thresholds for descent and return
That is how industrial imaging stays repeatable.
The exposure mistake that ruins line detail
The photography source makes a point that drone operators should internalize: protecting highlights does not mean intentionally underexposing everything. It means refusing to sacrifice bright detail simply because the screen looked dim in sunlight.
With power lines, highlight protection is operationally significant for two reasons.
1. The sky is usually the brightest part of the frame
When the conductor sits against a bright sky, you are balancing a thin dark subject against a luminous background. If you raise exposure too much, line separation weakens and fine components disappear into the bright area.
2. Metallic and ceramic hardware can reflect sharply
Clamps, connectors, and some insulator surfaces can produce small but intense bright regions. Those are exactly the kinds of highlights that clip first. Once clipped, later analysis becomes less reliable because edge information is gone.
This is not a theoretical post-processing complaint. It affects whether a maintenance team can clearly review what was captured.
So on the T50, expose for retention, not for screen comfort.
A useful field habit is to slightly bias exposure downward from what looks “pleasant” on the display during strong midday sun, then verify with objective indicators if available rather than your eyes alone. The source is correct: a bright outdoor environment tricks operators into lifting exposure unnecessarily. That habit is expensive.
Borrowing a measurement mindset from TOF sensor training
One of the more interesting reference documents is not about the Agras T50 at all. It is a training page describing a front-facing TOF ranging sensor mounted on an educational drone expansion module. The hard number is small but revealing: the TOF sensor’s maximum measuring distance is 1.2 meters against an indoor white wall, and the training exercise has the operator compare the sensor readout with a tape measure while gradually moving away from the wall.
Why mention that here?
Because the method matters more than the exact hardware.
The training logic is this: do not assume the displayed value is the same as reality. Validate it against a known reference.
That mindset belongs in every T50 power-line imaging workflow.
When planning stand-off distance from conductors, towers, poles, or adjacent structures, crews should not rely on intuition developed from the live image alone. Build a repeatable reference method. Even if your actual field stack uses different sensors and positioning systems, the operational principle stays the same: compare what the aircraft reports with what the environment demands.
The TOF example also highlights another subtle point. The display in that training setup converts millimeter measurements into centimeters for easier reading, using a scrolling matrix screen because only limited digits can be shown at once. In other words, the interface simplifies reality. That is convenient, but simplification can hide nuance.
The same thing happens when pilots reduce flight decisions to what “looks about right” on screen.
For high-altitude power-line capture, that is not good enough. If you need centimeter precision in your positioning logic, then validate your RTK fix rate, maintain stable geometry, and avoid making stand-off choices based solely on the visual feed.
Plan the capture like a corridor survey
The LiDAR project reference offers a useful planning model. The team established target accuracy at 5 cm horizontal and 3 cm vertical, set a fixed coordinate framework, and defined workflow roles before collection even began. They also specified a collection speed of 25 km/h and used two-pass acquisition.
The T50 mission profile will differ, but the planning discipline is worth copying.
For line capture, build your operation around five preflight questions:
What is the corridor?
Even a short utility span should be treated as a defined corridor with a start, end, and side constraints. Record the intended line segment length and the safe working envelope.
Where will visual obstruction occur?
The Shunde example noted that main roads had fewer tree obstructions, while side roads were heavily blocked by vegetation and parked vehicles. In power-line work, trees can interfere with line of sight, GNSS quality, and route flexibility. Identify where those conditions will compress your safe path.
What is the precision requirement?
If the purpose is only general visual documentation, your tolerance is broader. If the imagery will support engineering review, then your route spacing, hover discipline, and geotag reliability need to tighten. “Centimeter precision” should not be an empty phrase. It means your positioning chain must justify it.
How many passes are necessary?
A single pass often misses detail because line hardware presents differently depending on viewing angle and sun direction. The survey reference used dual-direction collection. That is smart. A forward and reverse capture on the T50 often reveals different edge contrast and shadow behavior.
What is the real field risk?
In the road survey example, frequent large trucks affected measurement conditions. For line capture, equivalent disruptions include gust funnels near terrain, reflective haze, nearby vegetation movement, and unstable GNSS near built structures.
This kind of planning sounds basic until you compare it with failed missions. Most failed missions were not blocked by the aircraft. They were undermined by weak preflight thinking.
A battery management tip from field experience
Here is the field habit I recommend to every T50 crew doing elevated infrastructure capture: never start a precision climb sequence on a battery you would be comfortable using for broad-acre spraying.
That may sound obvious, but in practice operators often carry over agricultural battery judgment into imaging work. The problem is that line capture is spikier. You climb, stop, hover, yaw, reposition, hold framing, and sometimes repeat because the first angle was compromised by glare. Those micro-corrections are inefficient compared with a cleaner straight-line work pattern.
My rule is to reserve the freshest battery set for the segments that combine the highest climb demand with the brightest sky conditions. Why? Because low-voltage behavior under repeated hover correction can subtly erode your willingness to stay patient with the shot. The crew begins hurrying. Exposure decisions become rushed. Stand-off discipline gets looser. The mission quality drops before the battery is technically “empty.”
A practical routine:
- Use earlier batteries for low-altitude familiarization passes and route confirmation.
- Save a stronger pack for the high-detail capture window.
- Set a stricter return threshold than you would for field application work.
- Do not treat “one more angle” as free.
That last point matters. Infrastructure capture punishes greed. One extra hover can cost the calm margin you needed for a safe descent and clean landing.
Environmental toughness helps, but it does not replace technique
The Agras T50 is built for harsh outdoor work, and that ruggedness is one reason operators trust it in demanding environments. Features associated with weather resistance, including IPX6K-level protection language often cited around professional field platforms, are valuable in agricultural operations where water, dust, and residue are routine realities.
But resilience is not the same as image quality.
A tough airframe can fly in hard conditions and still deliver poor files if exposure discipline is weak. Likewise, a stable RTK link does not rescue clipped highlights. A strong spray workflow does not automatically translate into a strong visual documentation workflow.
Each subsystem solves a different problem.
- RTK fix rate supports positional consistency.
- Airframe durability supports operational uptime.
- Battery discipline supports safe and patient collection.
- Exposure control protects the actual information in the image.
If your goal is to capture power lines cleanly at altitude, all four have to work together.
What to do in the field, step by step
Here is the condensed method I would teach a T50 crew.
1. Inspect the corridor first
Borrow from survey practice. Identify total segment length, obstructions, likely GNSS trouble spots, and alternate landing points.
2. Avoid judging exposure by screen appearance alone
In bright sunlight, the display lies. If the frame looks slightly dark on site, that can be exactly right.
3. Protect highlights
Do not blow the sky or reflective hardware just to make the live view look more comfortable. Bright clipped areas rarely give detail back later.
4. Fly at least two directional passes
The mobile LiDAR reference used dual-direction collection for good reason. Reverse angle can reveal line separation and attachment detail missed on the first run.
5. Validate distance logic
Take the lesson from TOF training: compare system-reported assumptions with reality whenever possible. Do not build stand-off habits from intuition alone.
6. Use your best battery for the hardest segment
High-altitude infrastructure capture is hover-heavy and correction-heavy. Fresh battery margin protects judgment.
7. Review for information, not beauty
You are not grading a postcard. You are checking whether line edges, insulators, and connection points remain distinguishable.
If you need a second pair of eyes on route setup or field workflow, you can message a technical specialist here before your next deployment.
The real takeaway for Agras T50 operators
The interesting thing about these reference materials is that none of them were written as an Agras T50 power-line playbook. One is about exposure discipline in landscape photography. Another is about a small TOF sensor with a 1.2 m range on an educational drone module. A third is a road-corridor LiDAR workflow that planned around vegetation, access, and accuracy targets across an 8.14 km route.
Yet together they point to a sharper way to use the T50 for elevated line capture.
- Trust objective capture logic more than screen appearance.
- Validate distance assumptions instead of guessing.
- Plan your route with survey-level discipline.
- Treat battery quality as part of image quality.
That is how you stop coming back with files that merely looked fine in the sun and start returning with imagery that holds up under real review.
Ready for your own Agras T50? Contact our team for expert consultation.